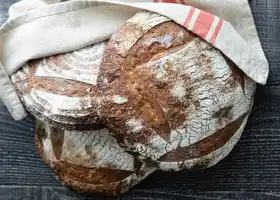
How to make your own sourdough bread and starter recipe
Ingredients
400g strong white bread flour
100g wholemeal, rye or spelt flour
360ml tepid water
100g sourdough starter (see below)
10g salt
Method
1
In the large bowl of a stand mixer (or large mixing bowl), combine the flours and 350ml of the tepid water and stir until there is no dry flour left. Cover the bowl with a tea towel, and leave to the side for 30 minutes. This process is called the autolyse and helps to hydrate the flour particles, making it much easier to knead the dough later.
2
Add the starter into the bowl, attach the dough hook to the stand mixer and knead on a medium speed for one minute. Add the salt and remaining 10ml water and knead for another 4 minutes on a medium speed. If you do not have a food mixer, add the salt and remaining water and knead by hand for 10 minutes.
3
Cover the dough with a damp tea towel and leave for 30 minutes.
4
After 30 minutes, gently stretch and fold the dough in the bowl a few times by hand. Cover again and repeat the same process every half an hour three more times, then leave the dough to prove at room temperature (in the bowl, covered with a tea towel) until it doubles in size.
5
When ready, flour your worktop and tip the dough very gently out onto the surface. Shape into a smooth round shape and place into a floured bread proving basket or a bowl lined with a clean, floured tea towel. Cover and leave in the fridge overnight.
6
The next morning, remove the basket of dough from the fridge to bring up to room temperature. Preheat your oven to as high as it will go (240°C-250°C/Fan 230°C/Gas Mark 9).
7
When the oven is ready, transfer the dough on to a baking tray, score with a serrated knife and slide into the oven. Spray the inside of the hot oven with a few spritzes of water, then bake for 35 minutes.
8
When ready, remove from the oven and transfer into a wire rack. Allow to cool before slicing.
9
Sourdough is extremely popular and once you get your starter alive, it will pretty much last forever as long as you keep feeding it. Follow the below steps for about a week until it’s ready.
10
Use a clean glass jar or container and weigh 50g of strong bread flour and 50ml of water at room temperature. Stir to form a rough dough, it doesn’t need to be completely smooth, just no dry patches of flour. Leave the mixture uncovered somewhere draught free in your kitchen for 24 hours.
11
The following day, discard half of the mixture and add another 50g of flour and 50ml of water and stir well. Leave uncovered once again for another 24 hours.
12
Repeat this process for a total of 5 days always with the jar uncovered. By this time, you will see some bubbles in the jar, and that is the indication that the yeast is developing.
13
Now, for a few more days, you will need to do this process twice a day until the starter is alive and bubbling a few hours after it has been fed. This is called the active starter.
14
At this point, if you’re not going to bake bread on a daily basis, you can keep your starter in the fridge and feed it once a week to keep it alive. A feed will be the same process that you’re used to, but now that the starter is alive and active, you want to remove three quarters and replace it with the same amount of flour and water. Rather than discarding the starter, you can use spare starter in pancakes, muffins or quick breads.
15
A common mistake people make when they bake sourdough is using the starter when it is not fully active. To check if the starter is ready, try the 'float test'. All you need to do is drop a spoonful into a bowl of cold water, if it floats, you can make the dough, and if it doesn’t, leave the starter uncovered a little longer until ready.